MinIO on Windows
MinIO is an S3-compatible object storage solution that our system supports. However, MinIO is not included with our software and must be installed separately by the user.
Find out more about minIO here.
Disclaimer
- We do not distribute MinIO with our software.
- We do not modify MinIO or provide a customized version.
- Users are responsible for setting up and maintaining their MinIO installation.
Licensing
MinIO is licensed under the GNU Affero General Public License v3.0 (AGPLv3).
If you modify and distribute MinIO, or provide it as a service over a network, you must comply with the AGPLv3 license terms.
For more details, see the official MinIO license information:
MinIO License
1. Download
Get the latest MinIO pkg file by running command:
https://dl.min.io/server/minio/release/windows-amd64/minio.exe
2. Create folder
Before starting the minio server, you need to create a folder where data and other information will be stored. To do this, create a folder on the data carrier, e.g. C:\minio. Remember that the folder can be placed anywhere, for the purpose of this tutorial we chose this location C:\minio.
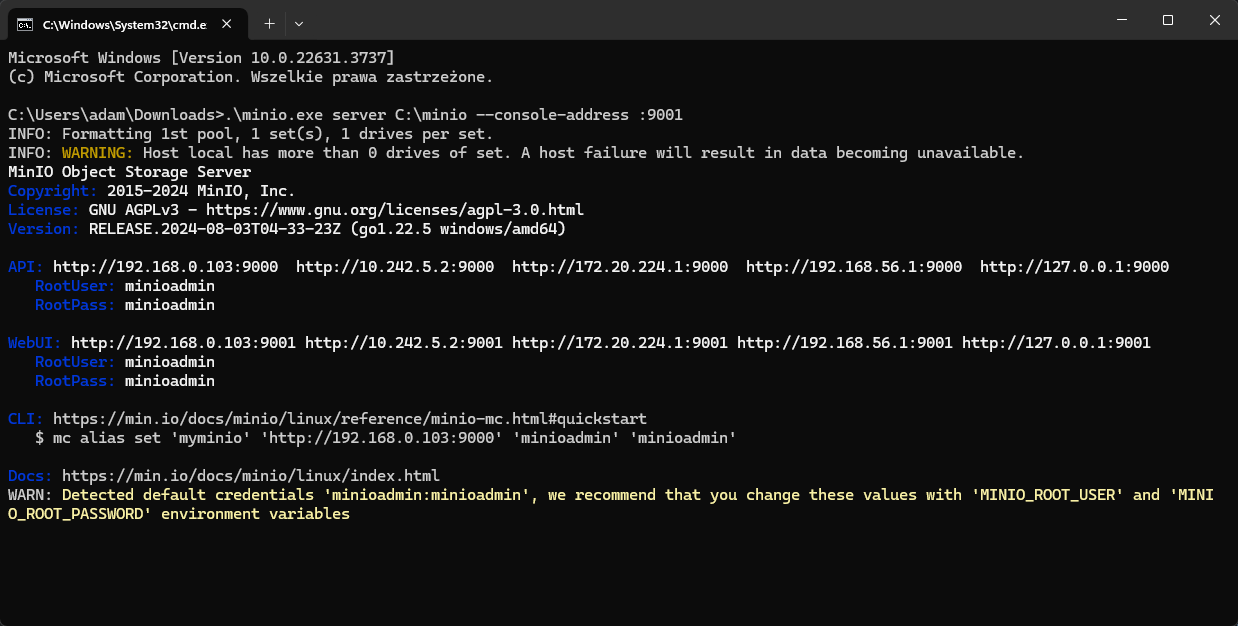
3. Launch the MinIO server
In PowerShell or Command Prompt, either navigate to the directory where the executable is located or add the path of the minio.exe file to the system's $PATH.
Run this command to start a local MinIO instance in the C:\minio folder. You can substitute C:\minio with a different drive or folder path on your local machine.
.\minio.exe server C:\minio --console-address :9001
.\minio.exe - path to minio.exe file C:\minio - path to minio folder where data will be stored --console-address :9001 - minio console address
4. Minio console
If everything goes well, please open, in web browser, the console using path to WebUI.
In our example it is http://127.0.0.1:9001. If you see the MinIO console in the browser, it means that everything is working well.
General Documentation
Check the general documentation for a detailed explanation:
MinIO for Windows
Next Steps
In order for the server to properly communicate with our priint::suite we still need to configure the integration.
Configuration of object storage SDK and rendering worker service
Documentation about the configuration of object storage SDK and rendering worker service can be found here:
Configuration of Object Storage
Setting up your first bucket
Documentation setting up the first bucket can be found here:
Using Object Storage in project