Installing Publishing Server on Windows
Contents
This document contains step-by-step instructions.
If you need more information please refer to the page Additional Installation Options.
The main steps are:
- Check prerequisites
- Unpack and copy the base package
- Copy the update package with the latest build version into the update folder of the base package
- Run the installation wizard from the update package
- Test the installation
Prerequisites
Check each point below. Start installation only if all requirements are fulfilled and all necessary information has been collected.
Installation Resources
You need to have the latest publishing server 7z, zip files:
- PubServer_Base_4.x.x.7z (the "base package")
- PubServer_Install_Update_4.x.x.XXXX.zip (where 4.x.x is the pubserver version and XXXX is the latest released patch) (the "update package")
Usually you find these in your Werk II FTP account.
Hardware info:
The latest hardware info can be found here:
Database information: All necessary information to connect to the database server as privilege/root user: Server Name, port, login, password.
User Account: Application Server (Payara) will typically be installed as a Windows service. It is recommended to create an own user account (e.g. named "PubServer") with sufficient permissions.
Firewall rules: As publishing server clients will be connected via the HTTP, application server ports have to be reachable from the network. Port numbers can be configured during installation.
Network Shares: In contrast to previous versions of priint:suite in 2025.1 (4.6) and higher, "Network Shares" are not needed anymore. InDesign template documents and image files will now be stored in the Object Storage and checked-out and checked-in using the priint:comet InDesign Plugins or the embedded priint:comet PDF Renderer. Please make sure that the configured Rendering Service local temporary directories are accessible with read and write permissions for the Rendering Service Windows-Service user. The priint:comet InDesign Server Plugins will use the system temporary directory which also needs to be accessible with read and write permissions for the InDesign Server Windows-Service user.
Antivirus-Exclusions: On many Systems there will be Antivirus/Anti-Malware Clients installed. The Publishing Server Directory ($priint_path) should be excluded from Live-Scans since it can have an impact on the Performance of the Publishing Server if Files in this Directory are accessed by an Antivirus Scan during use. It can also lead to unwanted behavior of the Publishing Server itself. Additional Exclusions should be the Document Root Path and temp Path that will be configured during the first steps of the Installation. This can be a local File-System Exclusion or an exclusion on an UNC Path/Network-Share. Traffic between the Clients/InDesign Server and the Publishing Server should also be excluded from any Scans.
Sync on Cloud-Services: The Publishing Server as well as any InDesign Clients/InDesign Server shouldn't be installed in Directorys that are Syncing to any kind of Cloud Services. This can lead to unwanted behavior ! Especially InDesign Desktop doesn't like it if any of it's Directorys are synced to Cloud-Services. This also applies to the Documents Directory of a Users Machine since InDesign Stores it's XCache there.
Object Storage: The Object Storage (e.g. MinIO Server) must be installed and started or accessible by the Publishing Server. Please refer to this article how to install and configure it.
Document Conventions
| Name | Description |
|---|---|
$installer_path | Path of the folder containing the installers In this tutorial, $installer_path will be “C:\Users\USERNAME\Downloads”. |
$priint_path | Path of the folder where the applications will be installed In this tutorial, $priint_path will be “C:\Pubserver\PubServer460” |
$rdbms_host | Host of the database server |
$rdbms_port | Port of the database server |
$rdbms_user | Login of the database user |
$rdbms_password | Password of the database user |
$glassfish_user | Payara user name which will access the databases |
$glassfish_password | Payara password of the user |
$customer_name | Name of the customer which will be used for priint:suite configuration |
$entity_model_name: | Name of the default entity model |
$project_name | Name of the default project |
$instance_type | Type of the instance of the server (production, acceptance, test, dev) |
Base Package
Uncompress
Go in the $installer_path and uncompress the file PubServer_Base_4.6.0.7z using 7zip.
A folder PubServer_Base_4.6.0 will be extracted.
Copy
Copy the content of the extracted folder directly into the $priint_path
This folder contains all base components of publishing server. Main components are:
- Payara Application Server 6
- JDK 17
- MySQL Database Server 8.0
- Eclipse IDE with ison Plug-in for configuring Publishing Server
Update Package
Copy the package with the latest build version Go in the $installer_path and extract the PubServer\_Install\_Update\_4.x.x.XXXX.zip into the $priint\_path/update/PubServer\_Install\_Update\_4.x.x.XXXX folder
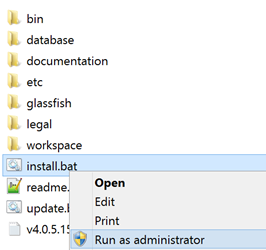
Go in the folder $priint_path/update/PubServer\_Install\_Update\_4.x.x.XXXX
And right-click on install.bat then Run as Administrator, allow the current program to run as Administrator: this will open the installation window.
Installation Wizard
Installer - Does not support scaling
If your Installation Wizard looks similar to this screenshot, your have activated scaling on your high resolution Display on Windows. The Installation Wizard does not support scaling. Please set the system scaling to 100% to use the Installation Wizard.
Install – Welcome
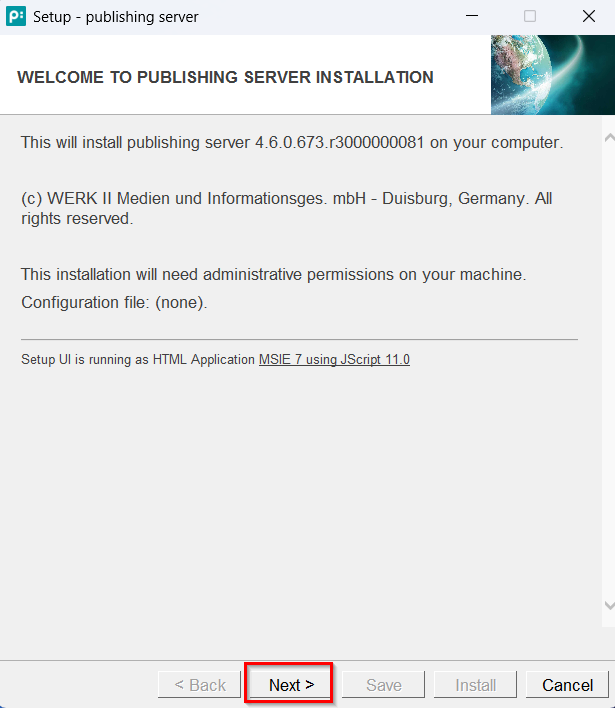
Click on Next
Install – License Agreement
Accept the license agreement

Click on Next
Install - Directories
Define the following paths:
Documents: InDesign documents (document templates) path. - in priint:suite 2025.1 (4.6) and higher this is only needed, if you want to migrate your old documents / document templates to object storage. New documents / document templates will be stored in object storage. If you are unsure just use the default.
Image: Images folder path - in priint:suite 2025.1 (4.6) and higher this is only needed, if you want to migrate your old images to object storage. New images will be stored in object storage. If you are unsure just use the default.
Temp: priint:suite sessions temporary folder
Upload: temp folder used to upload data
Download: Downloads folder path - in priint:suite 2025.1 (4.6) and higher this is only needed, if you want to migrate your old "Downloads" to object storage. New "Downloads" will be stored in object storage. If you are unsure just use the default.
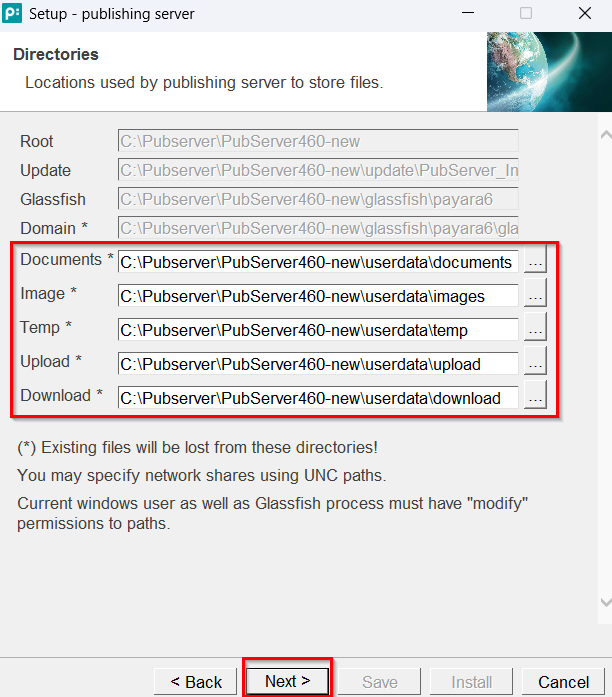
publishing server service should have read/write permission for this folders.
Click on Next
Install – Application Server
Define server name. The server name is used in URLs generated by the system and by InDesign server machines to address the server.
Define the base port. Other ports will be generated accordingly. Choose "0" for default settings of Glassfish.
Check Install Windows Service, if you are not installing your own private publishing server.
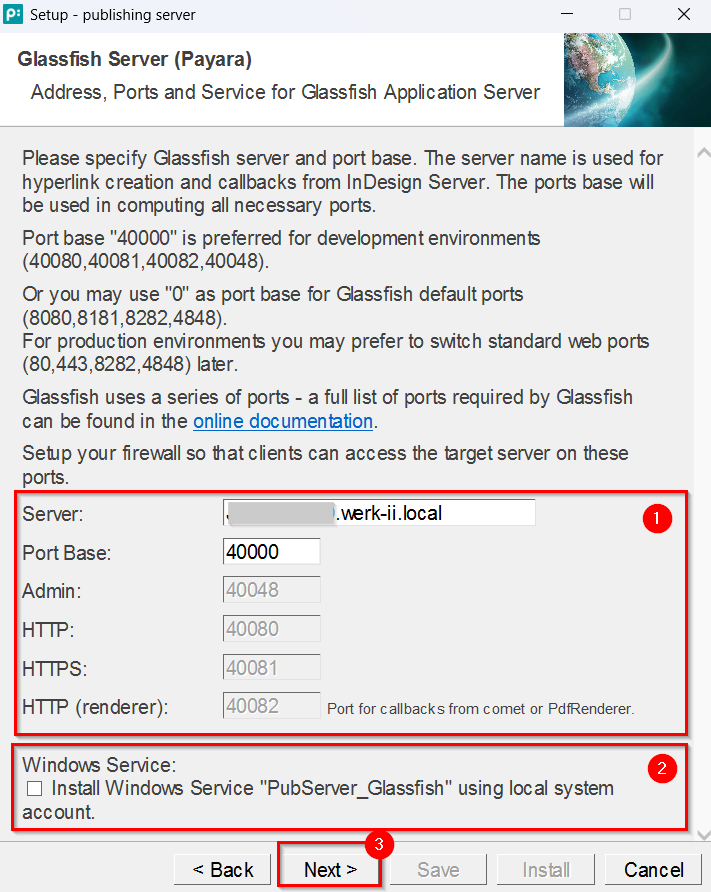
You can change settings for Windows Service (esp. User Account) later.
Click on Next
Install – Payara Administration
Define if you want to allow access to Payara administration for remote clients. N.B.: For remote clients SSL/TSL protocol will be used with a self signed certificate.
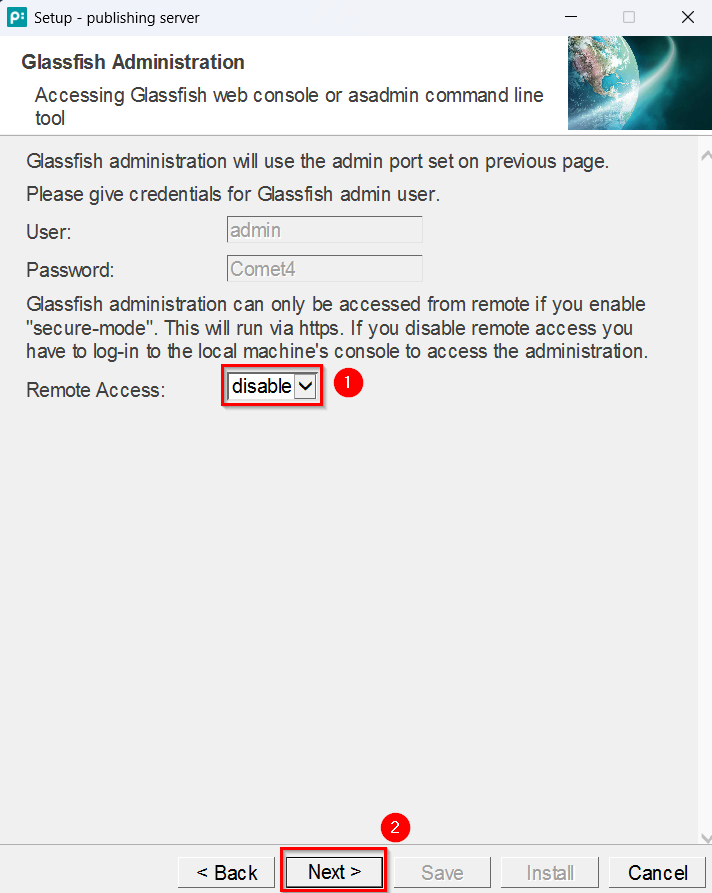
Click on Next
Install – Database Settings
Define the type / host / port / instance / prefix for the database access.
If using MYSQL there are two variants: the included MYSQL server ('Developer database') or an external installation of MYSQL. The included MYSQL server allows easy installation, but there is no Werk II support for updating the MYSQL software. The second possibility is to use an external installation of MYSQL. The options SQLSERVER and ORACLE both assume an external installation.
Hint: Please do not use a number at the beginning of the database prefix. Please always start with a letter or an underscore. This applies to all databases.
Define the user / password which will be used for Glassfish access
You have two options to create the databases and the user.
- Let the installer do it. This requires you give database admin credentials (3) in the dialog.
- Let the database admin guys do it manually. Select "Download SQL". A file will be written. Hand over the file to your database guys for inspection and installation. These SQL queries have to be executed before you continue. Admin user credential can be empty.
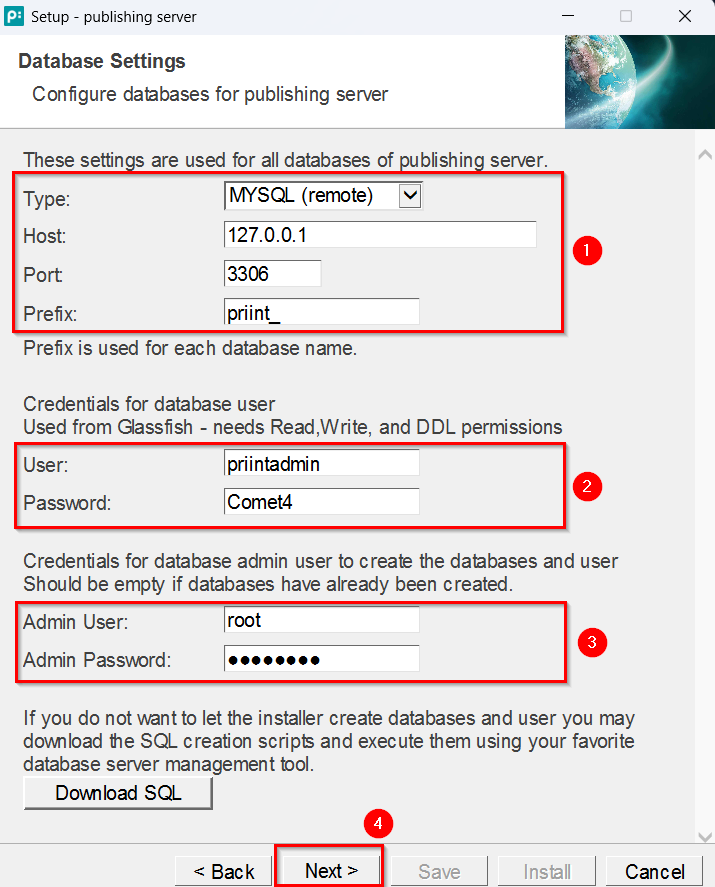
Click on Next
Install – Publishing Server Instance
Define the correct Instance ID based on the server type:
0 for production
1 for acceptance
2 for testing
3 for shared development
4 for single developer
Define the instance name (typically the server name).

Click on Next
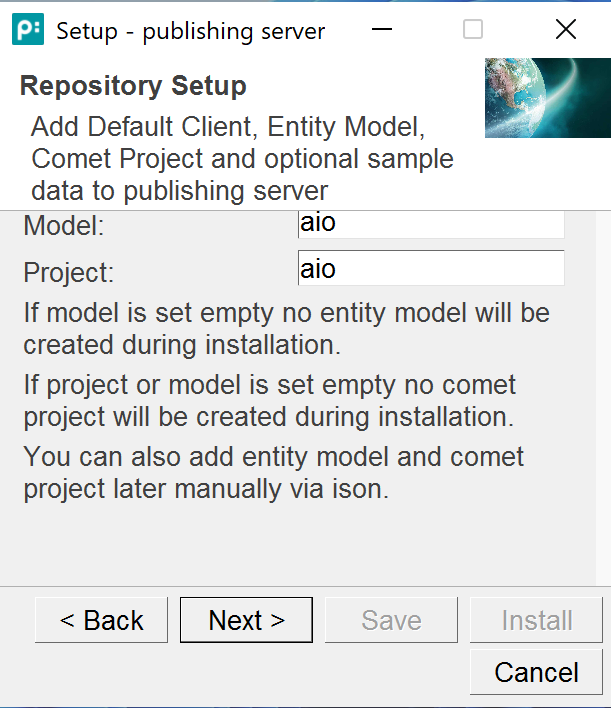
Install – Repository Setup
Define names for:
- Client (customer name)
- Model (Entity Model identifier)
- Project (comet Project identifier)
If you choose not to create an entity model and a comet project in this step, you must create both in ison before login into priint:planner is possible.
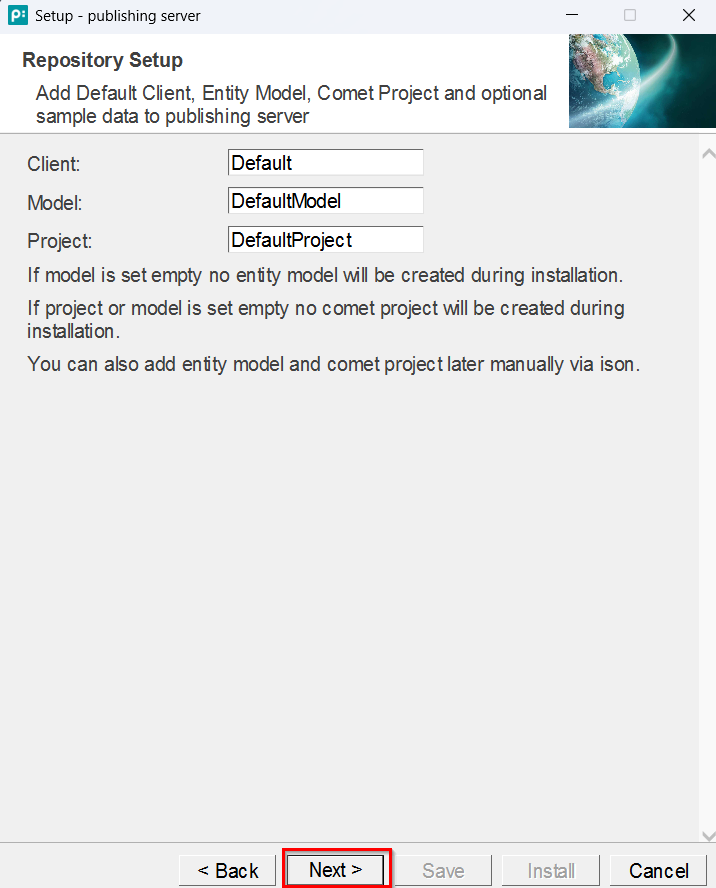
Click on Next
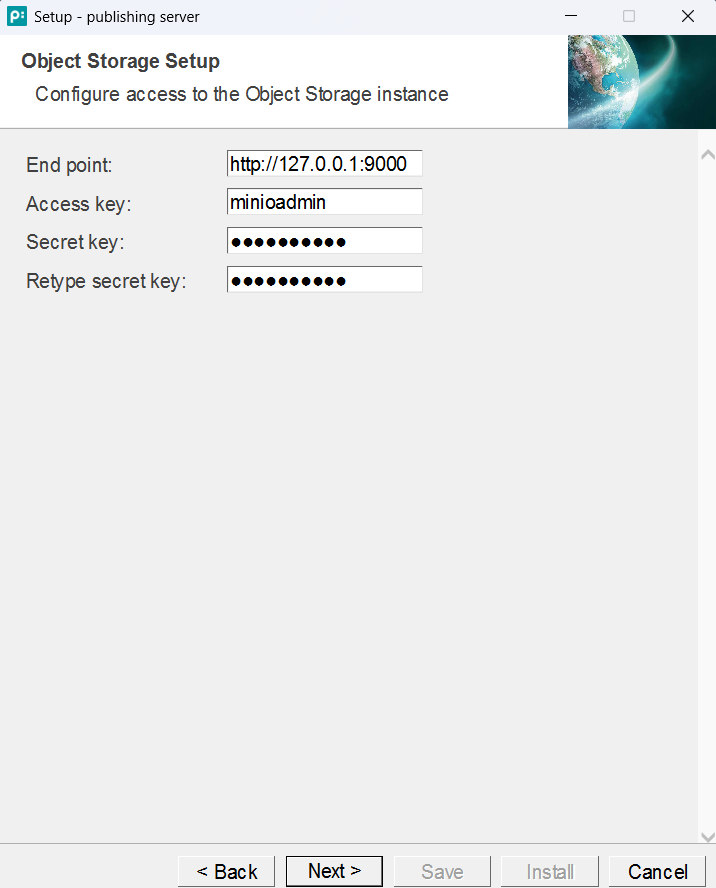
Install – Object Storage Setup
Define the end point under which your instance of the object storage can be reached.
Enter a valid access key for the object storage that shall be used by the publishing server.
Type the secret key for the given the access key and retype the same secret key in the other text field.
Important: These settings are copied during installation to the configuration file in payara domain config directory. Please look here.
Click on Next
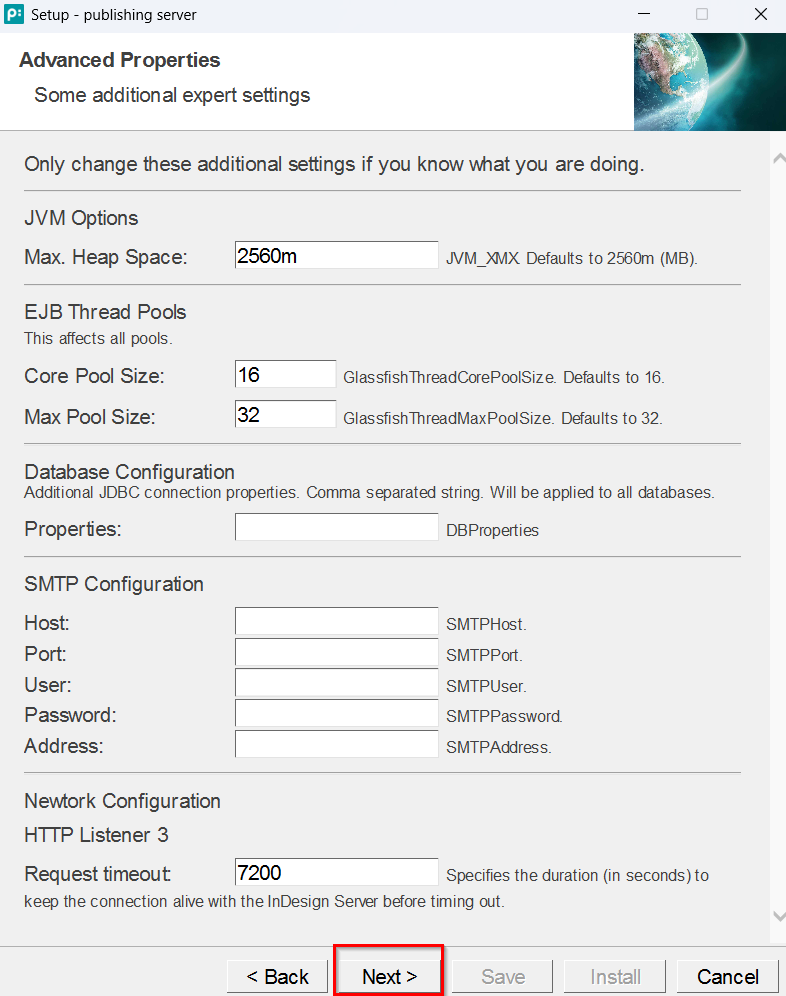
Install – Advanced Settings
Please only change the advanced settings, if you know what you are doing.
If you want to change the default values of the advanced properties, you can do it here.
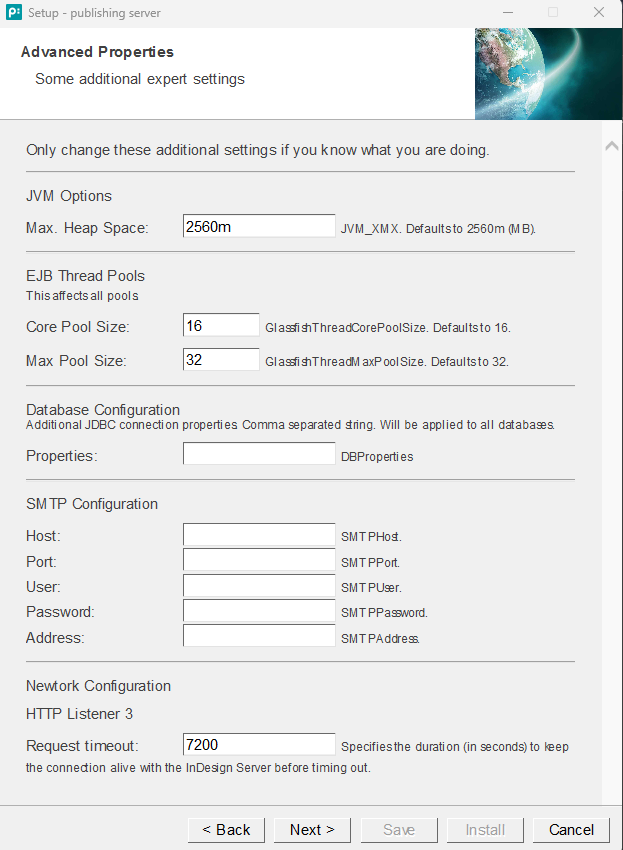
Network Configuration -> HTTP Listener 3 -> Request timeout
Click on Next
Install – Ready for Installation
Click on Install
Click on OK
N.B.: Installation configuration is saved to etc/settings.install.xml. This file can contain extended installation options not available through the wizard.

Install
A new console window will open showing the installation process.

N.B.: Installation can also be called by command line as follows:
call "$priint\_path\\update\\bin\\silent-install.bat "$priint\_path\\etc\\settings.install.xml"
Testing – Start server
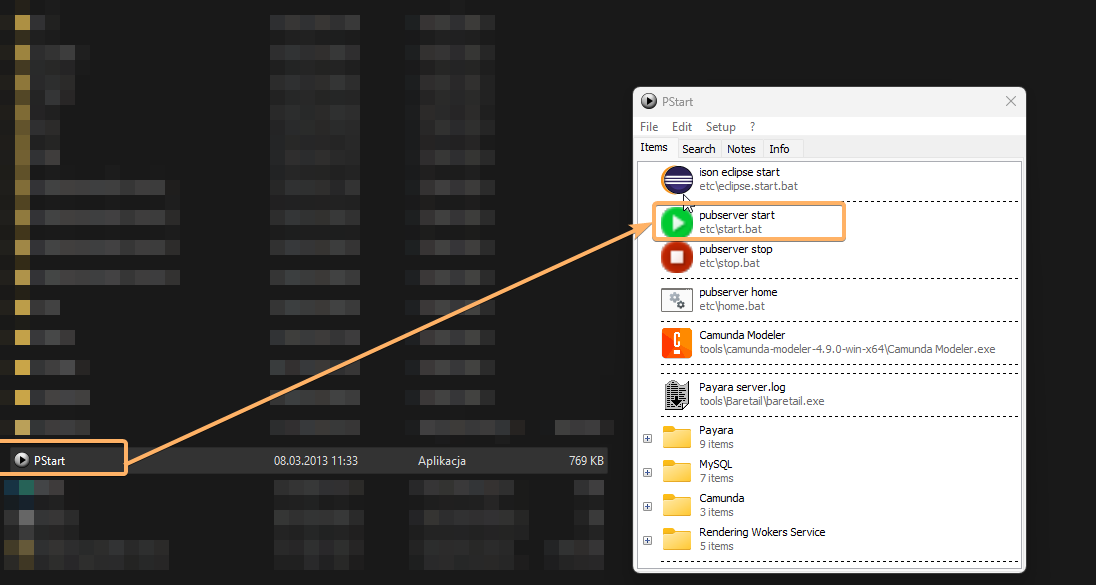
Go in your $priint_path folder and double-click on Pstart.exe (or better: "run as administrator").
In the opened window: double-click on pubserver start This will start Glassfish (and MySQL, if you have chosen local MySQL as database).
Then double-click pubserver home to open home page in browser
The web home of publishing server will come up. From the dashboard you can open the basic options.
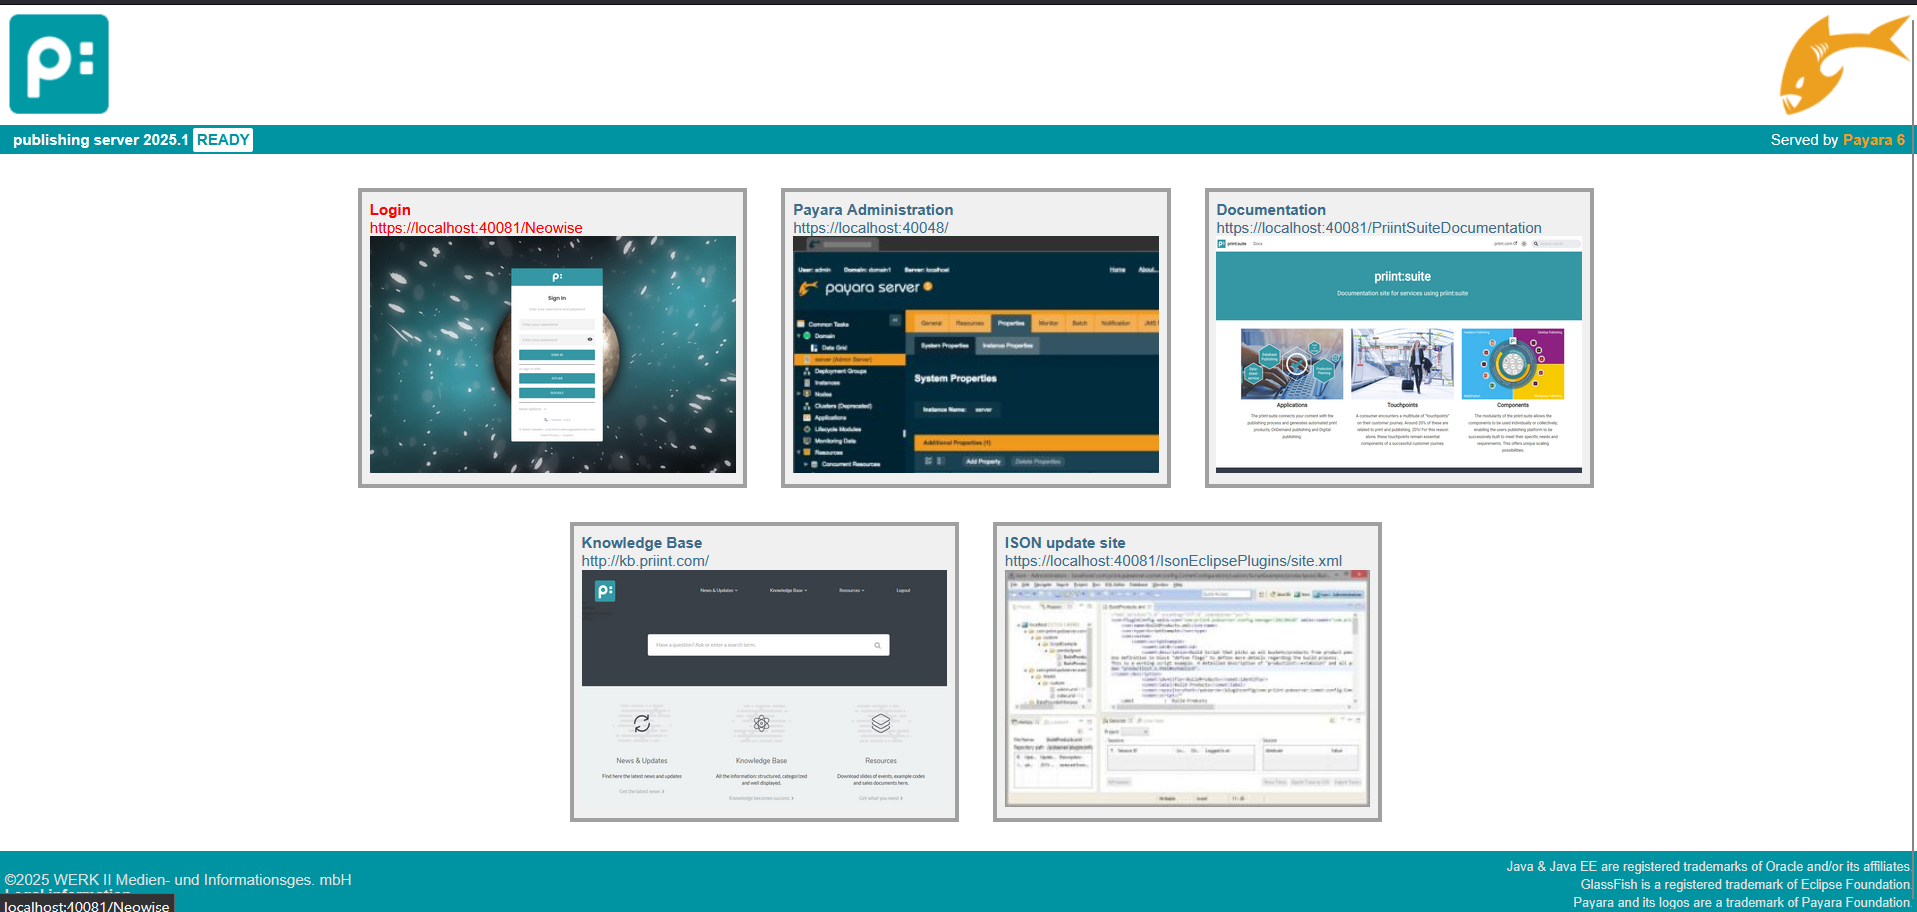
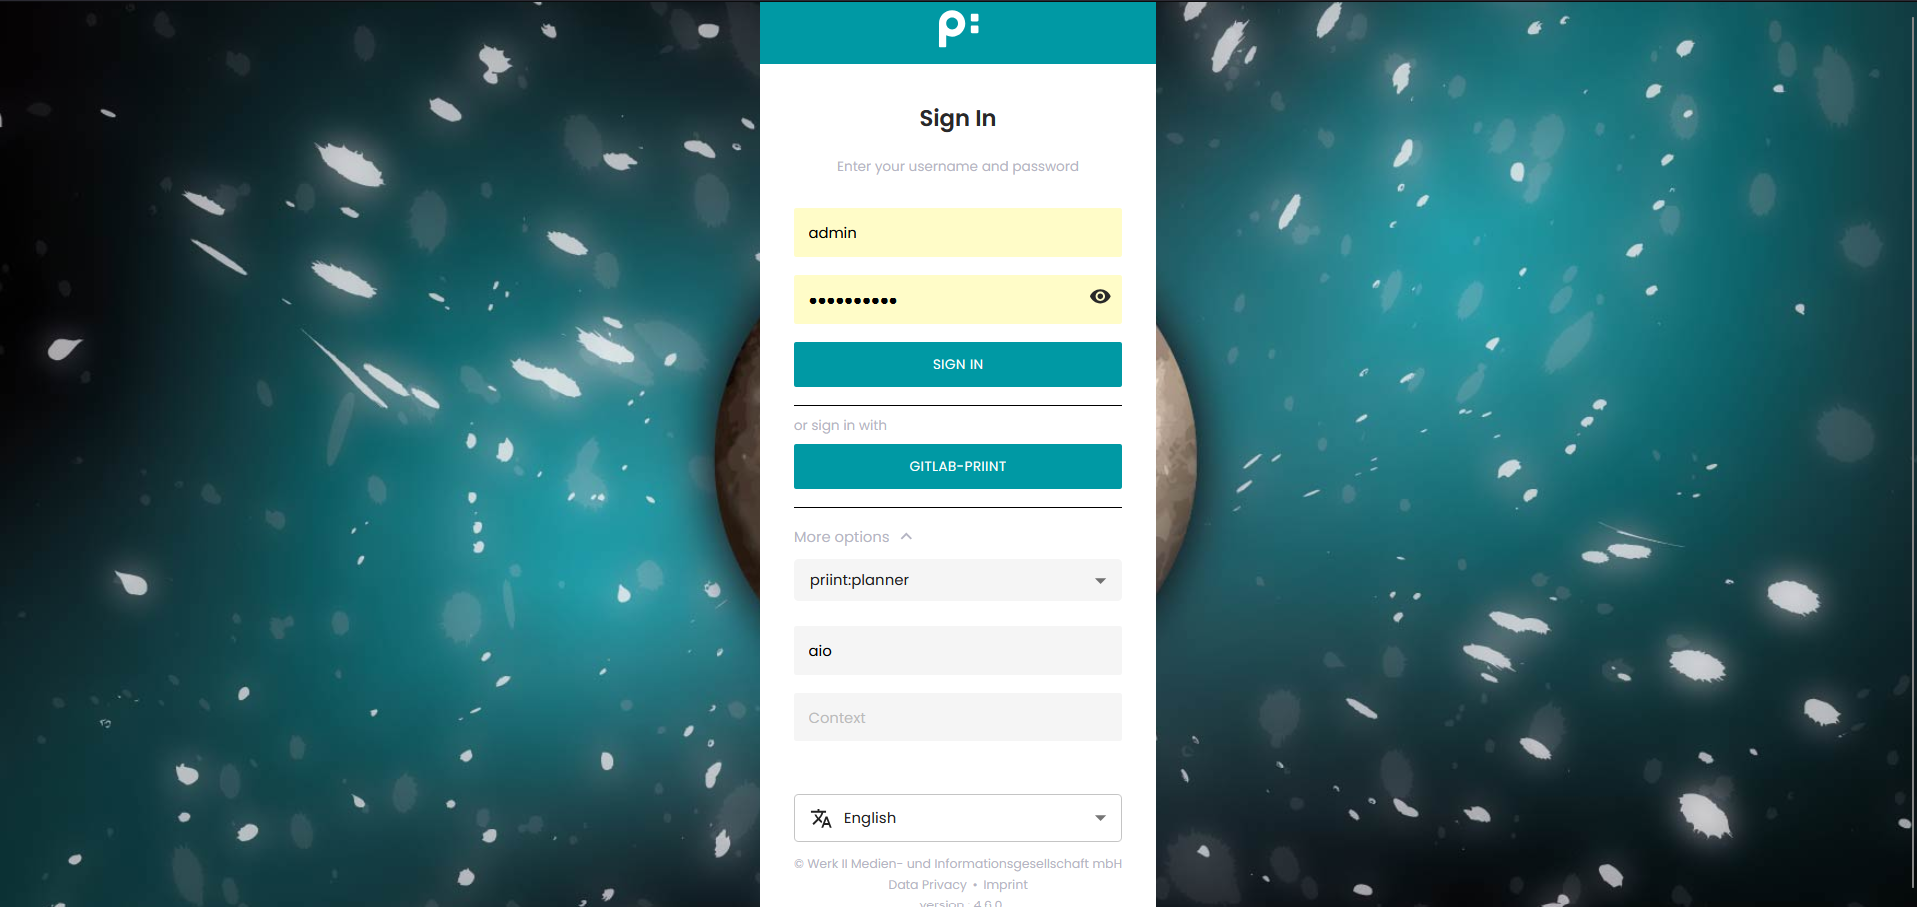
Testing – Login to priint:suite
From home page open "Login" link
Default credentials can be found here: https://kb.priint.com/index.php/article/default-passwords/
Use your $project_name as project in the UI.
Troubleshooting
A backup of the console log can be found in sub folder of update/logs.

Inspect install.log carefully.
If you call up priint.com support please add the following files to the case description:
- Folder
update/logs/<datetime> - Folder
update/backup/<datetime>/domain-config - Folder
update/backup/<datetime>/etc - Folder
glassfish/payara6/glassfish/domains/pubserver/logs/server.log